+91 99 49 444 123
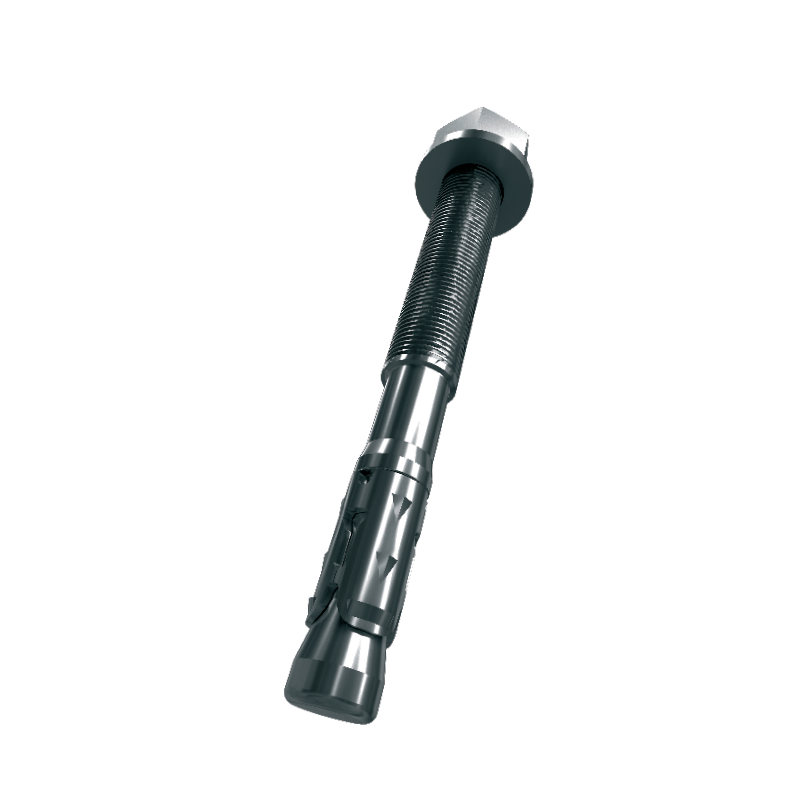
Facade anchors for fixing Dry Cladding Clamps.
Installation Procedure of Frame Fixing Anchor 753 A4/ 753 CRACK A4/ FM X5 A4 HEX HEAD
The fitness for use of the Frame Fixing Anchor 753 A4/ 753 CRACK A4/FM X5 A4 HEX HEAD can only be assumed if the anchor is installed as follows:
2. Drilling machine with both rotary and hammer mode.
3. Drill bit with required diameter according to anchor diameter.
4. A Blow pump to clean the hole.
5. Chuck adapter for placing the Torx Bit.
6. Cordless Screw driving Machine.
7. Torx bit according to manufacturer's specifications.
8. Technical Data Sheet of the anchor
2. Type of anchor required.
3. Installation being done in.
- The installation of Frame Fixing Anchor 753 A4/ 753 CRACK A4/ FM X5 A4 HEX HEAD shall be done only by suitable trained installer and under supervision on site; the conditions under which an installer may be considered as suitable trained and the conditions for supervision on site are up to the Member States in which the installation is done,
- Use of the Frame Fixing Anchor 753 A4/ 753 CRACK A4/ FM X5 A4 HEX HEAD only as supplied by the manufacturer without exchanging the components of the its system,
- Installation in accordance with the manufacturer's specifications and drawings using the tools indicated in the technical documentation of Manufacturer.
- Checks before Anchor installation to ensure that the strength class of the concrete/Brick in which the Frame Fixing Anchor 753 A4/ 753 CRACK A4/ FM X5 A4 HEX HEAD is to be placed is in the range given and is not lower than that of the concrete/ brick to which the characteristic loads apply,
- Keep the anchorage depth as specified in the design drawings or in the technical data sheet of the respective anchor.
- The drilling and cleaning of the hole and the installation shall be performed only with the equipment specified by the manufacturer according to the manufacturer's installation instructions, it shall be ensured that this equipment is available on site and it is used,
- Please check Technical data sheet for all the technical information.
- To install a door Frame Fixing Anchor 753 A4/ 753 CRACK A4/ FM X5 A4 HEX HEAD, the following accessories are required.
2. Drilling machine with both rotary and hammer mode.
3. Drill bit with required diameter according to anchor diameter.
4. A Blow pump to clean the hole.
5. Chuck adapter for placing the Torx Bit.
6. Cordless Screw driving Machine.
7. Torx bit according to manufacturer's specifications.
8. Technical Data Sheet of the anchor
- Align the door frame according to the requirement provided in the civil drawing of the building.
- After aligning the door frame, refer to the design report which gives some important information like
2. Type of anchor required.
3. Installation being done in.
- The alignment of anchors is as follows depending on the number of anchors
| Number of anchors | On hinges side of Frame | On lock side of frame | Top of the frame |
|---|---|---|---|
| 5 | 2 | 2 | 1 |
| 6 | 3 | 3 | 0 |
| 6 | 2 | 3 | 1 |
| 7 | 3 | 3 | 1 |
| 8 | 3 | 3 | 2 |
- The anchor to anchor spacing can be calculated according to below given formula Distance between anchors = Length of the frame / (Number of anchors on that side + 1)
- After acquiring the desired lengths, Marking of the same locations has to be done on the frame.
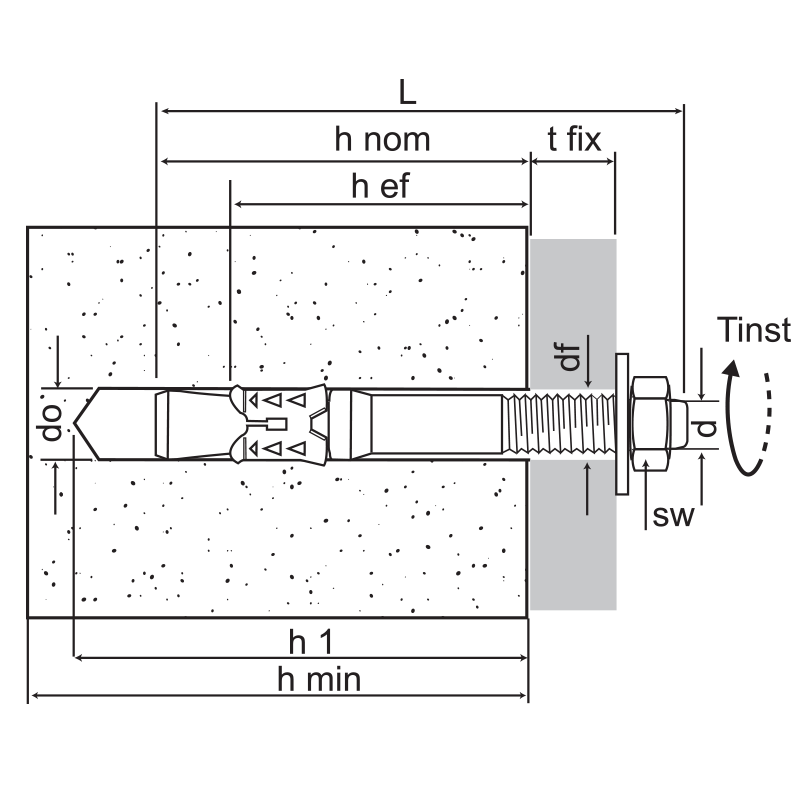
- Refer to the technical data sheet of the anchor being installed to know about the embedment depth into base material, total length of the anchor, thickness of the frame, Drill hole diameter.
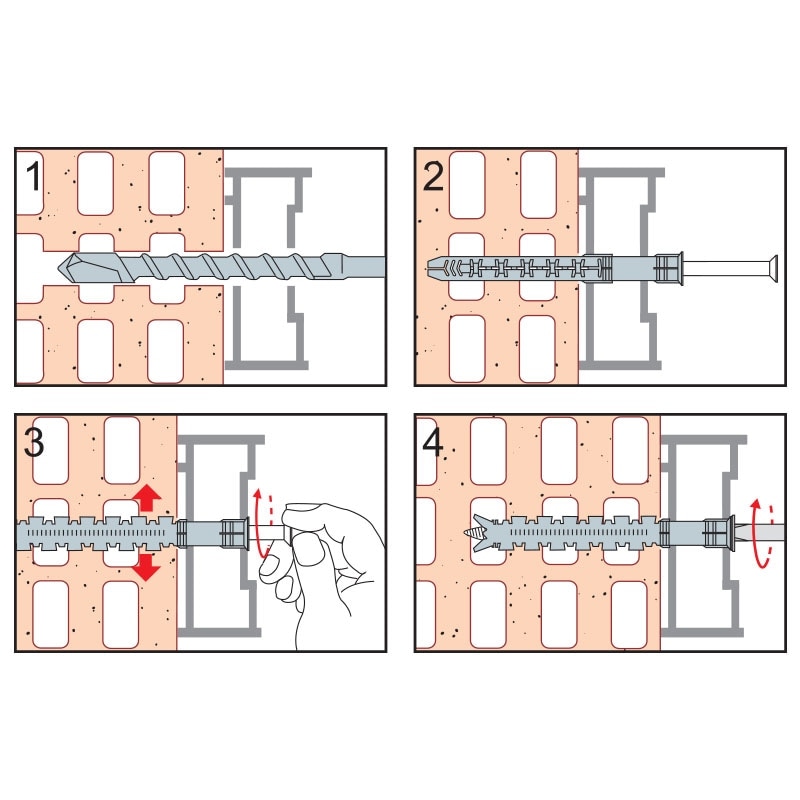
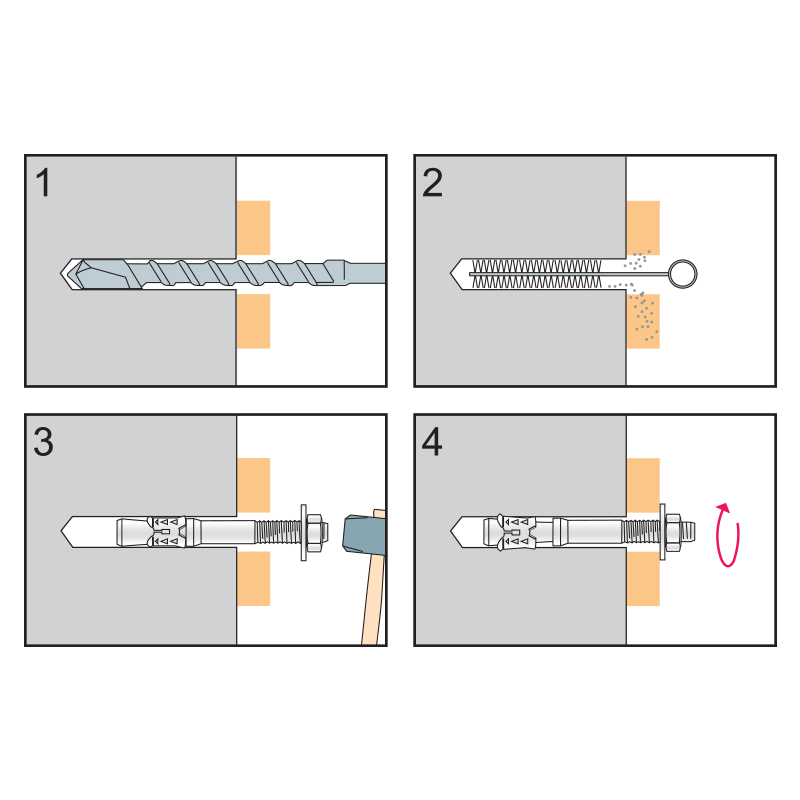
- Now by keeping the drill machine in the rotary mode, the drilling has to be done through the wooden frame.
- After completing the drilling into the wooden frame, the mode of drilling has to be changed to Hammering mode if the concrete is the base material.
- Other than concrete, the drilling can be continued in the same rotary mode up to the desired embedment depth.
- After finishing the drilling on all the side of the frame, clean the hole with the manual blow pump.
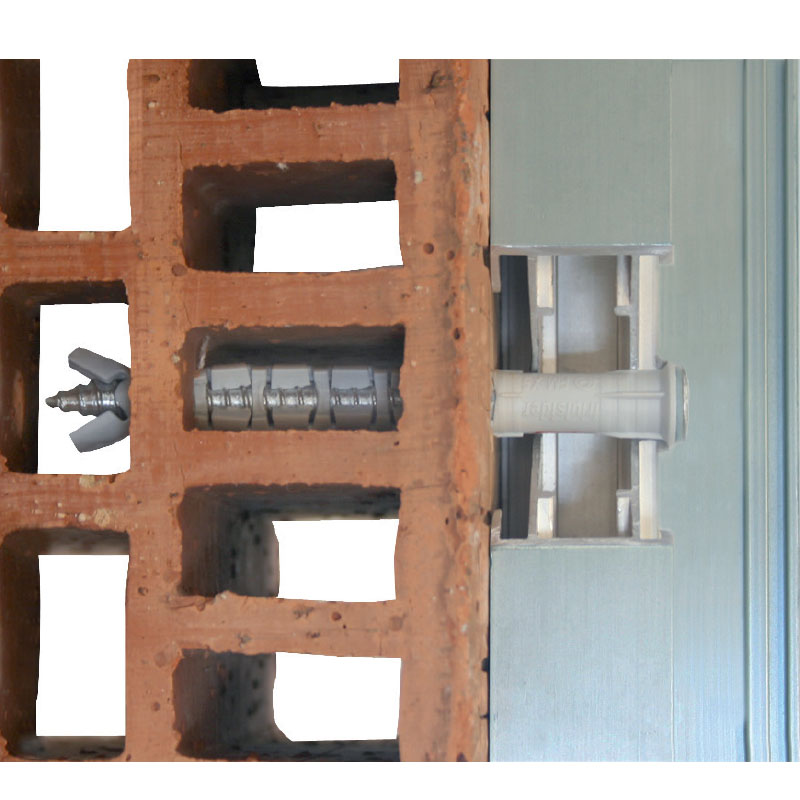
- After cleaning the holes, insert the plugs of the anchors into all the hole that has been drilled.
- Now if any final alignment if required can be done.
- Confirming the alignment, first install the screw of the anchor into the plug in top direction by using a Cordless screw driver or by attaching the adaptor into the chuck of the drill machine and by drilling it in rotary mode with respective Torx bit.
- After the installation of top anchor, the middle anchor of Hinges side has to be installed next followed by the lock side.
- And then the remaining anchors can be installed in a series of the same.
- This completes the installation of a Door frame by using door Frame Fixing Anchor 753 A4/ 753 CRACK A4/ FM X5 A4 HEX HEAD.
- Any changes made in the installation procedures will result in the movement of the door frame or sometimes even the damaging of the frame also.
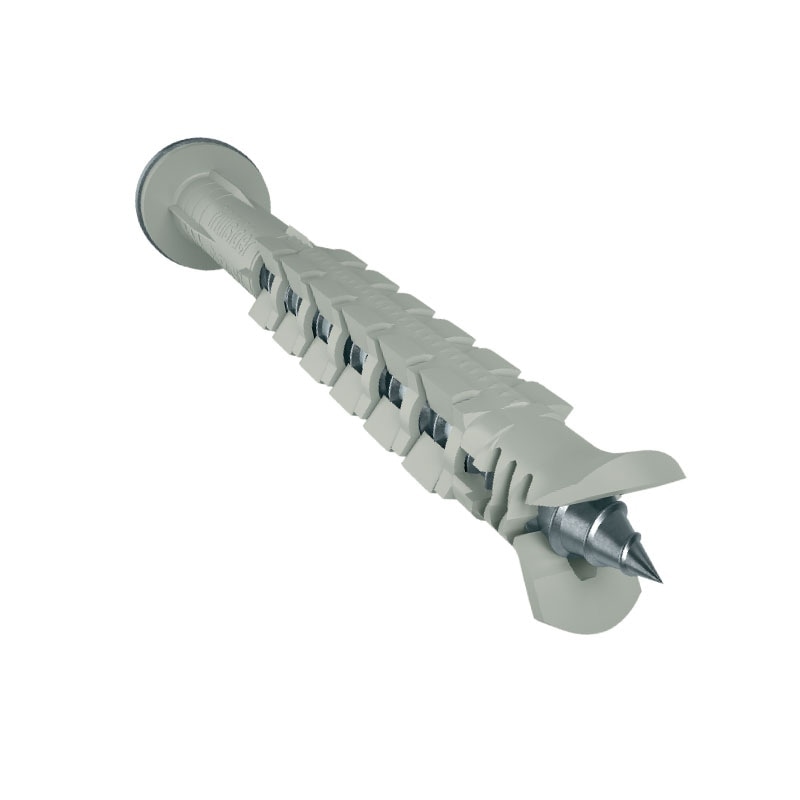
FM X5 Installation Process.
|
|
|
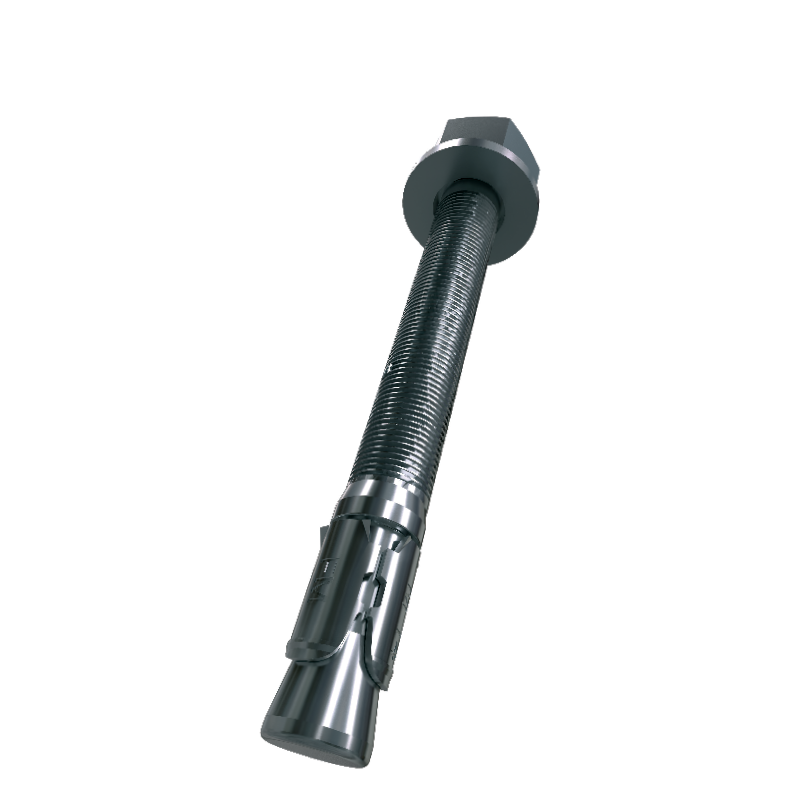
FM 753 Installation Process.
|

|

|
FM 753 Crack Installation Process.
|
|
|